How To Fix A Toilet Leak Around Base
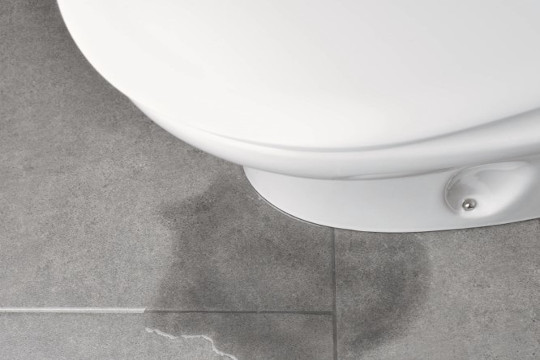
It can be scary to use a toilet that is leaking water around the base. The first thing in the morning is never a good time to step into water with bare feet. Rarely does a plumber’s assistance need to be sought because the cure is typically straightforward. The majority of fixes cost little money and take no longer than 30 minutes.
Why Toilet Leak Around Base
Toilet Condensation Collects On Floor
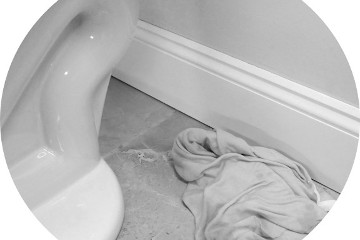
It makes sense to think that the toilet is leaking water from the inside because the toilet contains water. However, this is frequently the complete reverse.
The porcelain of a toilet bowl and tank is typically quite cold, as well. You’ll notice water accumulating at the base of your toilet if the room is damp because water will drip from the porcelain on the bowl. On the exterior of the toilet bowl or toilet tank, moisture-laden air may be condensing. Drops of moisture are created, which fall into the bowl or tank and assemble on the ground. This might be the result of a toilet that runs continuously or a temperature discrepancy between the water in the tank and the air in the room. Take some paper towels and clean the base of your toilet to see whether the extra water is just a little annoyance or an indication of a major issue. Flush the toilet once all the water at its base has been absorbed. Your leaky toilet problem is nothing more than a little condensation if water does not collect at the base.
By increasing or upgrading the bathroom exhaust fan, warming the bathroom, or putting a drop tray below the tank, this issue can be resolved by reducing or diverting bathroom condensation. If a constantly running toilet is contributing to the issue, it should also be fixed.
Toilet Is Not Tightly Fastened
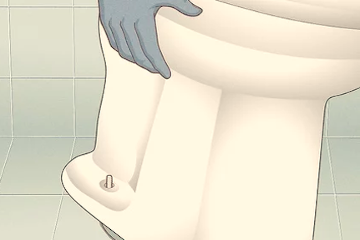
Bolts hold the toilets to the ground. The closet flange, which is made of metal or plastic and wraps around the top of the sewer pipe, is attached to the floor by these bolts. The seal created by the wax ring could break if these bolts become loose since the toilet will probably start to rock. If your tee bolts are really loose, drain water can leak out of the base every time you flush the toilet.
Toilet bolts could become looser with time. The water leaking around the base of the toilet can occasionally be stopped by tightening these bolts. The seal may also be leaking or loose, in which case you should repair it, causing the toilet to become loose (see below).
The lower bowl and the higher tank are the two main components of the majority of toilets. The tank is attached to the bowl using brass or plastic bolts and a connector known as a mack washer.
The O-ring gasket sealing the tank to the bowl may break or become loose, or these bolts themselves may become free. Sometimes tightening the nuts will help the two sections join better. If the gasket is defective, a replacement gasket can be used in its place.
Bolts that have rusted may be difficult to tighten and may need to be replaced. If so, you might want to think about hiring a specialist because cutting the bolts by hand needs a certain amount of skill.
Cracked Toilet Bowl
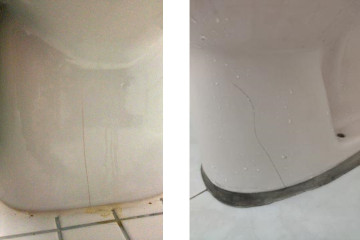
Toilet bowls are durable, but mishaps do happen and they can crack. The hairline cracks are often on the surface, but if they extend far enough, they may cause leaks at the base.
Leaky Water Supply Line
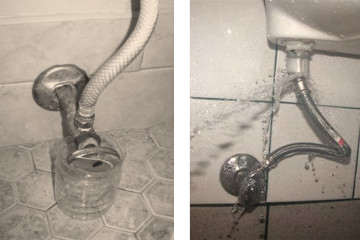
You are aware of the little hoses that emerge from your toilet’s wall? They might actually be to blame for your bathroom problems. Over time, the hoses may become worn out or damaged, which could cause your water supply line to slowly trickle water onto your floor. The supply line itself or the fittings holding the hoses to the water line and/or tank may be the source of the leak. If your house is more recent, it’s likely that all the lines need is a slight tightening to ensure their connections and form a watertight seal. Replace the water supply hose if tightening the fittings is unable to halt the leak.
You’ll notice that water is constantly leaking to the base of your toilet rather than just when you flush it if there is a leak in the water supply line.
Make that the rubber seal and nut at the junction where the supply line meets the tank are snug.
Clogged Drain
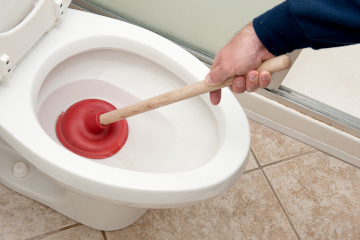
Your toilet may have a clogged drain line if water is leaking from the base and it clogs easily. The flushed water is transported out of the house through the drain line.
A clogged drain line can exert strain on your toilet’s wax ring, causing the ring to break and resulting in leaks.
Faulty Toilet Seal Leaks Water
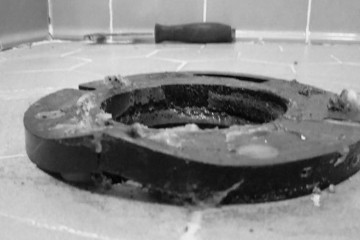
A wax ring that seals the toilet base against the top of the sewer pipe and closet flange is concealed underneath the toilet. The toilet is typically loose, necessitating the replacement of the wax ring.
The wax ring may also need to be replaced because it has become rigid over time due to wear and tear. This indicates that the seal is no longer secure. Water consequently seeps through the base as a result of it. Or the first wax seal might not have been strong enough.
If your leak is persistent and all other potential causes have been ruled out, your leak may be coming from a worn-out wax ring. To stop any water leakage, wax rings must be both airtight and watertight. How can you determine if your wax ring is the true offender, then? When your wax ring needs to be replaced, you might be able to smell it in addition to water collecting at the base of your toilet. It’s a good indication that your wax ring may have a hole or separation and the seal has been damaged if you notice a rotten egg odor coming from your toilet. If your toilet wobbles, there’s another indication that your wax ring could need to be replaced. This indicates that it is probably resting on a damaged flange.
The fix entails taking the toilet apart, cleaning the flange, and replacing the wax seal with a silicone ring or a better seal.
Considerations for Safety
Avoid letting water seep from the toilet’s base since it is unclean. When handling toilets, put on some latex gloves. When finished, completely disinfect the workspace by cleaning it with a solution.
What You'll Need
Equipment / Tools
-
- Adjustable Wrench: To get rid of some of the nuts and bolts holding your toilet to the ground, you’ll need a wrench. Ensure that the wrench has an open end.
- Adjustable Wrench: To get rid of some of the nuts and bolts holding your toilet to the ground, you’ll need a wrench. Ensure that the wrench has an open end.
-
- Screwdriver: Depending on the type of toilet you have, you might require a set of screwdrivers to remove various toilet components so you can repair the toilet.
-
- Bucket: Need a bucket to transfer leftover tank water or bowl water into using a sponge
-
- Clean cloths: For this project, make sure you have plenty of cleaning cloths. Towels made of terry fabric and microfiber perform well.
-
- Bathroom cleaner: Utilizing an anti-bacterial bathroom cleaner, it’s crucial to clean the area around the base of your toilet. This makes sure that the leaking toilet water is cleaned thoroughly.
-
- Latex gloves: Gloves are crucial, especially when chemicals are present.
-
- Putty knife: Putty knife is required to repair the seal.
-
- Cordless drill: Manual removal of some of the nuts and bolts could be challenging. Make sure you have a power tool on hand, such as a cordless drill, to make it simpler to remove tight bolts.
-
- Hacksaw: There could be stripped and corroded bolts. If you have a hacksaw on hand, removing stripped and rusted bolts won’t be as frustrating for you. Cut through any toilet bolts, including the plastic ones on the toilet seat and the ones at the base.
-
- Caulk: Re-sealing the sides of your toilet to the ground requires caulking.
Materials
Wax Ring, Washers, Gaskets, Toilet Bolts, and Wax Seal or Silicone Seal
Instructions
Make Sure It Is Not Caused By Toilet Condensation
Check the outside of your toilet bowl to be sure condensation isn’t the cause of the issue before starting your toilet repair endeavor.
Check out How To Limit Or Control Toilet Condensation to stop water condensation around the toilet base if condensation is the cause of the issue.
Continue looking for the issue’s origin if this is not the issue.
Verify It Is Not Leaked from Water Supply or Toilet Tank
A loose water supply line connection, a malfunctioning water shutoff valve, or a poor seal between the toilet tank and its base could all be to blame if your toilet leaks constantly. Shut off the water supply and fix or replace the line connection or shutoff value if the leak is in fact originating from the water supply. It’s also conceivable that the toilet tank is where the leak is coming from. To see if the leak is stopped, first try tightening the tank bolts and drying the toilet. If not, a new tank-to-bowl gasket must be installed. Visit How to Stop Toilet Tank Leak for more information.
Toilet Leak Around Base Only After You Flush
The toilet bowl itself is where the water comes from if your toilet merely leaks at the base after you flush. This kind of leak is unhygienic in addition to possibly harming the tile and subfloor in your bathroom. If this is the case, there are two main causes.
-
- Your floor bolts are loose.
- The wax ring in your toilet may be broken or malfunctioning.
- Your floor bolts are loose.
How to Tighten Loose Toilet Floor Bolts
-
- Take Off The Plastic Bolt Caps: Take off the toilet base’s plastic dome-shaped caps. To remove the cap, squeeze it. To loosen it, use a screwdriver or nail file.
- Take Off The Plastic Bolt Caps: Take off the toilet base’s plastic dome-shaped caps. To remove the cap, squeeze it. To loosen it, use a screwdriver or nail file.
-
- Tighten Floor Bolt Nuts: The nuts on the bolts need to be tightened if the toilet shakes from side to side. Take hold of the nut with pliers. To tighten the bolt, turn it in a clockwise direction. On the opposite side, repeat. (Be careful when tightening the bolts. If the nuts are tightened too much, the porcelain foundation may crack, making the toilet inoperable. A damaged toilet can only be fixed by replacement.
-
- Test The Toilet Movement: Try to move the toilet from side to side while holding the rim. The toilet shouldn’t move if the nuts are snug enough. Replace the plastic bolt caps on the toilets.
How To Change A Broken or Faulty Wax Ring
-
- Shut Off Water: The water supply line can be turned off from below. Flushes the bathroom. Remove the toilet’s water supply line by its screw.
- Shut Off Water: The water supply line can be turned off from below. Flushes the bathroom. Remove the toilet’s water supply line by its screw.
-
- Drain Bowl Water: Utilize a towel to mop up the water remaining in the toilet bowl.
-
- Remove Floor Bolt Nuts: The floor bolts’ plastic caps should be removed. To remove the floor bolts, use the pliers.
-
- Remove Toilet: To remove the toilet off the floor, give it a little wiggle. Next, raise the toilet straight up and discard it. Displace the toilet.
-
- Scrape Off Old Wax Ring: Remove the old wax ring from the toilet’s base. Scrape all wax residue from the floor closet flange with the putty knife.
-
- Replace With New Wax Ring: If using a wax ring, place it on the toilet’s base with the drain hole in the center. The floor closet flange should be mounted on top of the silicone ring if one is being used.
-
- Reset Toilet Operation: Grab the toilet bowl close to the seat hinges, raise it, and move it across to the flange. Using the closet bolts as a guide, place the toilet onto the wax gasket. After placing the washers on the bolts, tighten the nuts. To compress the gasket, however, press down firmly on the bowl’s rim before tightening the screws.
Make sure the toilet tank is parallel to the back wall by checking this. Tighten the closet bolts in turn until they are both snug. Then apply extra pressure to the bowl and tighten the nuts a bit more. Continue doing this until pressing down on the toilet causes the nuts to stop feeling loose. Once more, take care not to overtighten the wrench lest you shatter the toilet. After cutting the closet bolts almost flush with the nuts with a hacksaw, fasten the bolt caps.
Water supply line should be reattached. Before flushing, turn on the water supply and let the tank full up. Open the valve, then repeatedly flush the toilet. If there is a leak, apply pressure to the bowl and tighten the nuts a bit more. Use the toilet for a few weeks if it isn’t leaking, then pry off the bolt caps and tighten the nuts again. After multiple uses, the toilet frequently settles.
Caulking or Not?
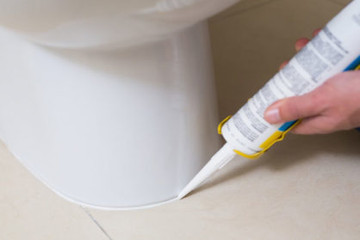
In the realm of plumbing, there has been much discussion on whether or not you should caulk around a toilet’s base. Because they are worried that the caulk will hide any leaks, the majority of plumbers don’t. To prevent bacteria from forming in the joint, homeowners are required by some local building codes in some municipalities to caulk around the toilet.
For information on the code requirements in your town, contact the building department. If you do decide to caulk, use a tub and tile caulk that is of good quality and is mildew-resistant.
Caulking the toilet base is not intended to serve as a leak barrier, but rather as a means of strengthening the connection between the toilet and the floor. Caulking the base reinforces your efforts if you have managed to install the tee bolts and place the toilet correctly. Additionally, caulk stops water from other sources from penetrating the space beneath the toilet and posing problems like mold growth or bad odors. To caulk the base of your toilet, just follow these easy steps.
-
- Select silicone-based “tub and tile” or bathroom caulk that is mildew-resistant. This will stop moisture and fog from seeping into the foundation. Look for a hue that goes with your toilet.
- Select silicone-based “tub and tile” or bathroom caulk that is mildew-resistant. This will stop moisture and fog from seeping into the foundation. Look for a hue that goes with your toilet.
-
- Clean the area where the caulk will be applied, including the floor and the area surrounding the base. Block the parts where you don’t want the caulk using masking tape.
-
- Put caulk in place. The ideal tool is a caulk gun, but you may also use your finger or a basic caulking tool to adjust the shape.
-
- Completely fill the space between the floor and the toilet base. Be advised that a solvent is necessary to clean this kind of caulk. Caulk dries quickly, so don’t wait too long to shape it.
-
- Wait a few minutes before removing the tape. Caulk residue can be removed with a rag and solvent. Give it a full 24 hours to dry.
Similar Articles
Trending Articles
Join To Receive
Promos and Discounts
For your Job Needs
*As an Amazon Associate I earn from qualifying purchases. Products prices and availability are accurate as of the date/time indicated and are to change. Any price and availability information displayed on Amazon at the time of purchase will apply to the purchase of this product. Promo codes may expire any time
